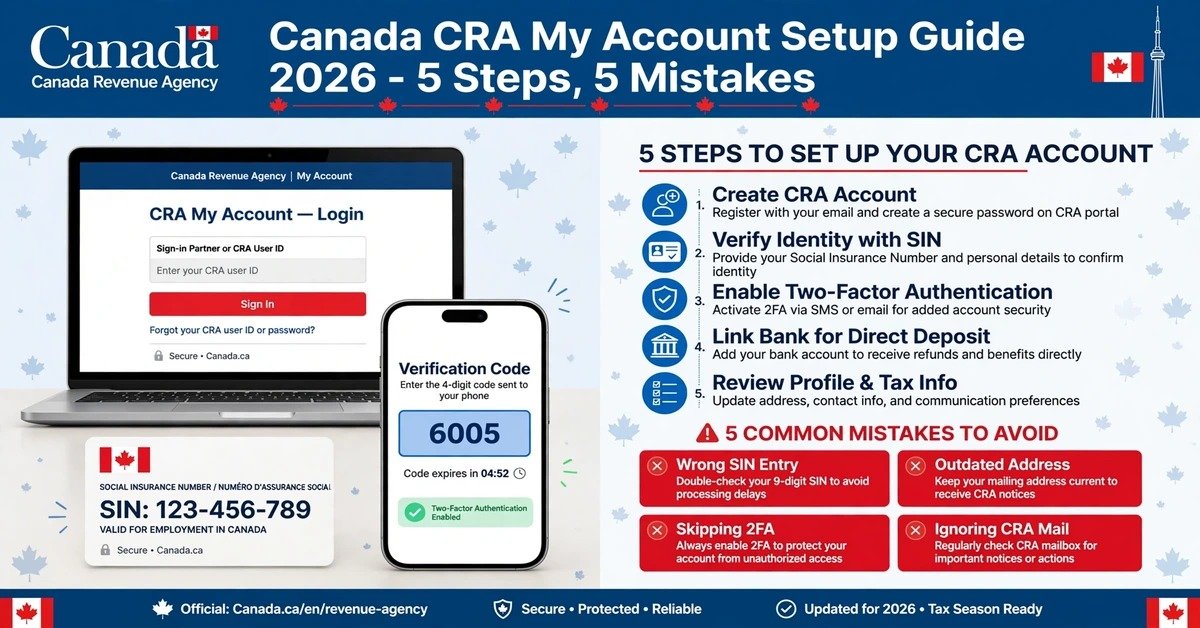
- Set up early for maximum convenience: Creating your CRA My Account as soon as possible saves you hours of hassle. It gives you instant access to your Notice of Assessment (NOA), tax slips, and time-saving features like Auto-fill My Return.
- Choose the right login path: You can sign in using a Sign-In Partner, a CRA User ID, or a Provincial Partner. However, your eligible options will depend on your Canadian tax filing history.
- Avoid two common setup traps: Most registration headaches happen when people skip instant identity verification or rely blindly on Auto-fill data.
- Keep up with recent name changes: As of July 2026, the CRA officially renamed the GST/HST Credit to the Canada Groceries and Essentials Benefit (CGEB). You will see this new name updated inside your portal.
CRA My Account: Do You Actually Need One?
To give you a short answer: yes, absolutely. Furthermore, setting it up sooner rather than later will save you plenty of time down the road.
Once you log in, you can pull up your Notice of Assessment, inspect tax slips on file, and auto-fill your tax returns within minutes. Without an account, accessing these critical details usually means long phone queues and endless paperwork.
This guide walks you through setting up your CRA My Account seamlessly, while helping you avoid the five most common setup mistakes newcomers make.
What You Can Manage Inside Your Portal
CRA My Account serves as much more than just a seasonal login page. Once active, you can monitor and manage your entire Canadian financial life in one dashboard, including:
- Your real-time tax return status
- Your Notice of Assessment (NOA) history
- Official tax slips (such as T4, T4A, and T5)
- T2202 tuition information for students
- RRSP contribution limits and receipts
- Government benefit payments, including the CGEB
- Direct deposit details and balance owing
- Personal contact details and address history
- Past tax filings and imported Auto-fill data
⚠️ Important Benefit Update
As of July 2026, the CRA rebranded the traditional GST/HST Credit as the Canada Groceries and Essentials Benefit (CGEB). In addition, eligible recipients received a one-time top-up starting June 5. Consequently, you will find all payment histories listed under CGEB in your portal’s Benefits section.
5 Simple Steps to Set Up Your Account
Step 1: Gather Your Basic Information
Before launching the registration page, collect these essential items:
- Your Social Insurance Number (SIN)
- Your date of birth and current postal code
- One piece of identity verification:
- Option A (Instant Approval): A Canadian driver’s licence, passport, or provincial photo ID.
- Option B (Tax-Based): A specific line amount from a return you filed in the past two tax years.
Step 2: Choose Your Best Sign-In Option
The CRA provides three access portals, and each comes with distinct requirements.
| Sign-In Method | Requirements & Eligibility |
| Sign-In Partner | Uses your existing online banking login with major Canadian banks (RBC, TD, Scotiabank, BMO, CIBC, etc.). |
| CRA User ID | A custom username and password that you create directly on the CRA website. |
| Provincial Partner | Uses digital provincial IDs (currently available via BC Services Card in BC or Alberta.ca Account in Alberta). |
⚠️ Critical Note for First-Time Filers
Both the Sign-In Partner and CRA User ID routes require a record of a previously filed tax return. Therefore, if you are an international student or newcomer who has never filed in Canada, neither option will work initially.However, there is an easy workaround. If you reside in British Columbia or Alberta, you can register using the Provincial Partner option with just your SIN—no prior tax history required!
Step 3: Verify Your Identity Safely
- Multi-Factor Authentication (MFA) is mandatory for security. To verify your identity, choose between two methods:
- Document Verification Service (Fastest): Simply snap a quick picture of your ID and a selfie on your mobile phone. As a result, the CRA activates your account immediately with Full Access.
- Mailed Security Code (Slower): If you opt for mail, the CRA sends a physical security code to your home address, which can take up to 10 business days to arrive.
Step 4: Link to Auto-fill My Return
Next, open any NETFILE-certified tax software (such as Wealthsimple Tax or TurboTax) and connect your CRA account. The software automatically imports slips already registered with the government, including your T4 (employment) and T5 (investment) forms.
⚠️ What Auto-fill Won’t Cover
Auto-fill only pulls information already submitted to the CRA. Therefore, you must manually enter personal deductions like rent payments, medical expenses, and specific credits. Always cross-check auto-filled figures against your paper slips before finalizing.
Step 5: Review and Officially File
Finally, enter any missing credits, review your numbers carefully, and click submit. Keep in mind that you are not officially finished until your software displays a NETFILE Confirmation Number. Be sure to save this number for your records.
5 Common Account Mistakes to Avoid
❌ Mistake #1: Assuming Registration is Complete Without the Code
If you choose the mailed code option instead of Document Verification, your account remains in “Limited Access.” Trying to run Auto-fill during this stage causes system errors.
| Verification Method | Access Level |
| Document Verification | Full Access, immediately |
| Mailed Security Code | Limited Access → enter code → Full Access |
❌ Mistake #2: Profile Mismatches Between CRA and Software
If personal details like your name, address, or SIN on your tax software differ slightly from CRA records, NETFILE will reject your filing. Always match your software inputs word-for-word with official documents.
❌ Mistake #3: Trusting Auto-fill Without Checking Your Slips
Auto-fill only captures tax slips submitted to the CRA at that specific moment. If an employer or bank issues a late T4A or T5 slip, Auto-fill might miss it, which could lead to reassessment penalties later on.
❌ Mistake #4: Hitting a Wall as a First-Time Filer
If you have never filed before, do not panic when standard online verification blocks you. You do not actually need a CRA My Account to file your very first tax return. You can submit your initial return through NETFILE-certified software or on paper to establish your tax history first.
❌ Mistake #5: Exiting the Browser on the Summary Screen
Seeing an estimated refund summary does not mean you filed your return. You must click the final “Submit Return” button and receive your official NETFILE Confirmation Number to complete the process.
Quick Guide: Which Sign-In Option Fits You?
You already use online banking with a major Canadian bank:
👉 Choose Sign-In Partner for the easiest daily access.
You prefer keeping bank logins completely separate from tax accounts:
👉 Choose CRA User ID and Password.
You live in BC or Alberta with zero Canadian filing history:
👉 Choose Provincial Partner (BC Services Card / Alberta.ca Account).
You need full account access immediately today:
👉 Choose Document Verification Service via phone camera.
Frequently Asked Questions
A: Not necessarily. Standard sign-in methods require prior tax history. Unless you use a Provincial Partner ID in BC or Alberta, you can simply file your first return using NETFILE software without an account. Once processed, you can register easily.
A: Yes! You can use the Document Verification Service instead. By scanning your photo ID and selfie through your phone, you bypass the 10-day postal wait and gain instant access.
A: No, definitely keep them. Auto-fill might miss late-issued slips or deductions that require manual entry (like rent receipts or medical expenses). Furthermore, the CRA requires you to keep supporting records for six years.
The Bottom Line
When setting up your CRA My Account, focus on these two essentials:
- Identify the right sign-in path based on your filing history and province.
- Review Auto-fill data carefully before hitting the final submit button.
By following these simple steps, you will easily avoid common pitfalls and make every future tax season in Canada stress-free!
Disclaimer: This guide provides general information only. Tax rules and CRA verification policies evolve, so always verify the latest procedures on the official CRA website or consult a certified professional.